![fldata-logo.png]](https://help.fldata.com/hs-fs/hubfs/fldata-logo.png?height=50&name=fldata-logo.png)
Key Features
Differences from Legacy Forms
- Smart Forms have a cleaner, more modern look and feel.
- All fields are automatically reportable with auto-generated report label names.
- Smart Forms introduce new field types not available in legacy forms: Date Field, Number, Autocomplete, Rich Text Editor, Header, Hidden Input, and Divider.
- Conditional Logic is exclusive to Smart Forms and is not available on legacy forms.
Field Types
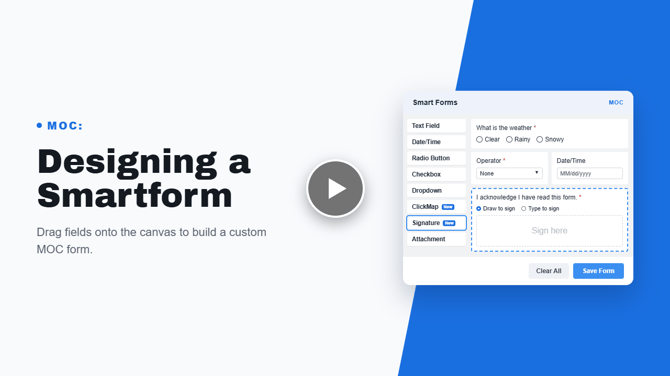
- Text Field – An open-response field for short answers.
- Date Field – A selectable calendar for picking dates.
- Number – A numeric-only input field.
- Radio Button – Allows users to select only one option from a list.
- Checkbox – Allows users to select one or more options from a list.
- Dropdown – Allows users to select one value from a drop-down list.
- Autocomplete – A customizable search field that can be tied to actions or recommendations, similar to a form tree.
- Text Area – An open-response field for longer answers, supporting up to 20 lines of text up to 100 characters wide.
- ClickMap – A clickable map that allows users to select areas as a response.
- Signature – Allows users to sign a form manually or with a typed signature.
- Rich Text Editor – Allows users to capture and format information such as instructions, bullet points, and media.
- Header – Provides a header for the form or a section.
- Label – Can be used as a title or instructional text for a section.
- Hidden Input – Acts as a spacing tool between sections.
- Divider – A solid, dashed, or hidden horizontal line used to visually separate fields.
Common Field Properties
- Fields can be dragged and dropped into any section of the form to determine layout.
- Click the Pen icon to edit a field's properties. Click the Trash icon to remove a field.
- All fields are reportable by default with an auto-generated report label name. Note: report labels will not auto-generate if the field name contains special characters.
- All field types support Conditional Logic, except the Divider field.
- Any data field (Text Box, Text Area, Radio Buttons, Checkboxes, Dropdown) can have a default value pre-populated, be marked as Required (displayed with a red asterisk), and include a Help Message that displays on hover.
Fields with Selectable Options
(Radio Buttons, Checkboxes, Dropdown)
- Options can be reordered by clicking and dragging them to the correct position.
- For Radio Buttons and Checkboxes only: options can be displayed inline (horizontally rather than vertically).
- For Radio Buttons and Checkboxes only: options can have an attached Comment text box, allowing users to enter optional qualifying comments when selecting a particular option.
Conditional Logic
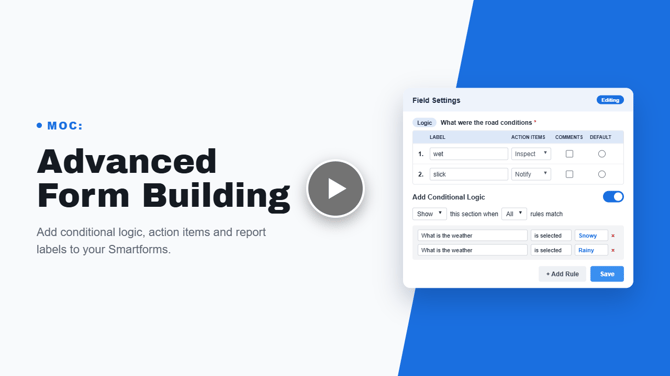
- Conditional Logic allows you to show or hide fields based on how a user answers another field, creating a more streamlined experience where users only see sections relevant to them.
- The Parent Field is the field whose answer triggers the conditional logic.
- The Child Field is the field that is shown or hidden based on the Parent Field's answer.
- For fields with selectable options (Radio Buttons, Checkboxes, etc.), available conditions are: is selected, is not selected, is shown, is hidden.
- For open-ended fields (Text Field, Text Area, etc.), available conditions are: is shown, is hidden, is equal to, is not equal to, contains, does not contain.
- Multiple rules can be configured per field, with the option to apply logic when All or Any rules match.
How to Create a Smart Form
- Go to Settings > Forms in the module menu.
- Click New and select Smart Version.
- If creating a form in ACT, select a Category from the drop-down. Event forms are associated with categories — when creating an Event, a category must be selected and the available forms for that category will be displayed.
- Enter a Title for the form.
- Optionally enter a Description, Header, and Footer.
- Deselect the Active checkbox if you want to inactivate the form while building it, to prevent it from being accidentally selected before it is ready.
- Enter the correct Company and Division.
- Select Public if you want other Divisions to be able to use and copy this form.
- Click Save.
How to Build Your Form
- Go to Settings > Forms and select the form title.
- Click Layout.
Note: If the Form Designer does not appear, make sure your browser's pop-up blockers are disabled.
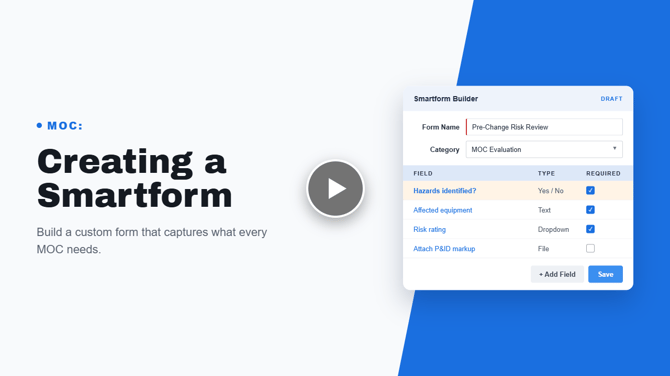
- Drag and drop fields from the field panel into the form layout, or click a field type to add it.
- Fill in the necessary properties for each field.
- When finished, exit the Form Designer.
- Click Preview to see the form as users will see it when completing it.
Tip: Use Undo and Redo in the field options panel to step backward or forward through recent changes. The form builder saves all changes automatically.
How to Configure Conditional Logic
- Go to Settings > Forms and select the form title.
- Click Layout.
- Identify the Parent Field whose answer will control the conditional behavior.
- Navigate to the Child Field you want to show or hide, and click its Pen icon to open its properties.
- Toggle on Conditional Logic.
- Choose whether to Show or Hide the Child Field when conditions are met, and select whether the logic applies when All or Any rules match.
- Configure the rule by selecting the Parent Field from the drop-down and choosing the condition that will trigger the logic.
- Select the specific user response that will trigger the logic. Available responses are based on the options in the Parent Field.
- Repeat to add as many rules as needed.
- Click Preview to view and test the configured logic before the form goes live.
Note: Smart Form changes are saved automatically.